Yay!! Steven and I are so excited to make this announcement! We are going to have an extra little person in our house this fall and we couldn't be more excited!
Wednesday, April 10, 2013
Monday, March 25, 2013
How do you take a wall mirror down!?
Recently our cute cousin Amy bought her first condo! We are so, so excited for her. My favorite part about the whole place is that it is really close to us! :) We were able to help her with some of her remodeling that she needed to do. One of the first things to go? The giant wall mirror!
Some people totally love them, and some people just don't. I must agree with her in the fact that I think they are pretty awful! Ha ha. The boys were in charge of taking it down. Amy had found this idea on the internet and I thought that I would share it with you guys in case you have a dreadful wall mirror!
Step One: Tape off the whole mirror with duct tape in a plaid pattern.
Step Two: Hammer it down! This is very, very loud. And make sure to wear gloves and eye gear! The boys told us that it was much easier to take down the mirror with the tape. The tape holds everything together so that it doesn't shatter all over the floor. There is still some clean up, but not nearly what it would have been. The tape kept it all in big chunks.
Brade was really excited about getting his picture taken. :) Hopefully this helps!
Halloween Wreaths!
I know, I know... It's not Halloween. But what can I say? October is my favorite month and Halloween is the BEST holiday.
These wreaths are not something I can take credit for, although I wish I was this incredible! I have this absolutely amazing hair client (and friend), Sandy. She seriously is the craftiest person I know and I love her amazing wreaths. She made these for her daughter/daughters-in-law last October. I had her email me the pictures and I am so excited to share them with you! I am hoping that I can make one as awesome as these this October. Take a look!
In order to get everything to stay on, she uses hot glue and wire. She was the one that taught me the amazing hot glue technique... Go to the D.I. and get an old pan. Melt glue in the pan and dip the entire ornament in the glue and attach to the wreath. This works so much better because the glue that you first put on isn't cold by the time you get to the bottom half!
Aren't these skulls absolutely amazing?? They are all great, but this is my favorite! She said that she always shops after the holiday is over to get the great prices. Then she just uses spray paint and glitter to make the ornaments exactly what she wants.
Thank you Sandy for sharing your amazing wreaths with us! And we need to have a wreath party! :)
Monday, February 25, 2013
Chalkboard Frames
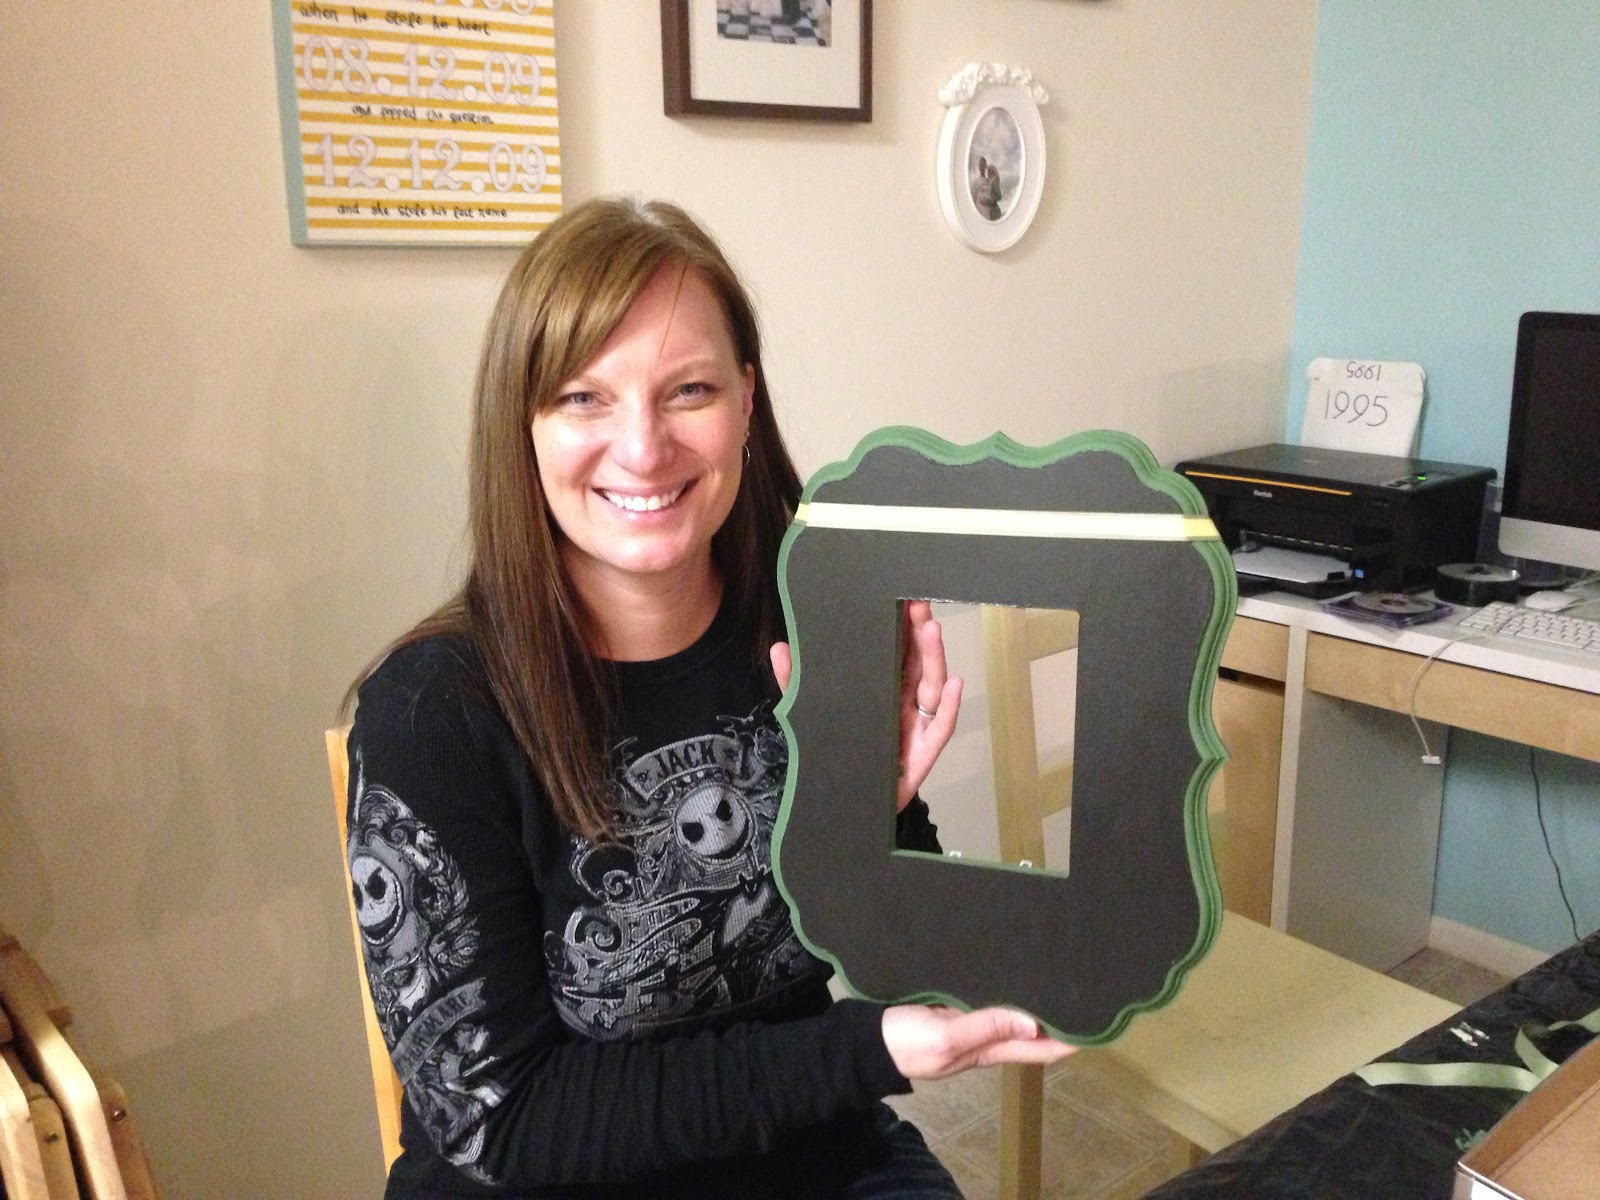
So I'm sure everyone has seen those cute frames that have the chalkboard in the center to write love notes to your cutie? Well what if it was done the other way around? I thought it would be fun to be able to write around the picture! So at the end of January we had a fun girls night and made some chalkboard frames!
They are very easy to make! I went to the great Wood Connection and picked up these cute curvy frames. We each picked our color for the back and sides and then let that paint dry. Then we used chalk board paint to paint the front of the frame. If you have ever worked for chalk board paint, you know that when you first start putting on the paint, it looks horrible! This was my first time using it and I was pretty nervous about it! Ha ha. It only took like 50 coats! But it ended up looking great!
The thing that I loved was that we all started out with the same items and yet they all turned out so different with our own personal flare. :) P.S. Aren't these ladies so cute?!
The thing that is great about chalkboard paint is how it feels. I loathe the feeling of school chalkboards! I hate that dusty feeling and the dust that is on your fingers and the horrible sound.. everything. But chalkboard paint is really smooth and the chalk goes on really smooth. Now we are ready to write our sweeties cute messages!
Monday, January 7, 2013
New Years Crafting Party
Happy New Years!!
Let me tell you a secret... Crafting New Years parties are the BEST New Years parties! This is my friend Courtney. She has been a bestie of mine since senior year in high school when we started hair school together. She is the cutest! She got married to Jordan last summer and we have so much fun with them. They are the sweetest couple!
We spent New Years with them this year and we decided to have a crafting/play station night... meaning the girls craft and the boys play zombie games of course. :)
Don't worry mom- it's sparkling cider! :)
These are one of the crafts that we did. I went to the Wood Connection a few days before and I picked up the wooden hearts and cute keys. These hearts are supposed to be for conversation hearts, but I thought of this idea to do instead.
They were so easy. We slapped some paint on the hearts and modge-podged the pictures. Once everything was dry, we added the ribbon and keys and stickers. They turned out so cute!
After crafting, we watched the ball drop and toasted with some sparkling cider! What a great New Years! Love you Court and Jord!
Cruisin' Through December
How was everyone's Christmas?! I can't believe it's already over. It went by way too fast. We got home from our cruise Christmas Eve and let me tell you, December is the best time to vacation!
Do you like our Christmas morning hair? :)
This is my cute family on Christmas morning. Notice the cute doll house in the middle for baby Lydia! (There will be a whole post about that doll house!)
These are Steven's cute cousins that we went on the cruise with. Aren't they so lovely? Best friends ever. In the spring I started making these blankets for them. I wanted to give them something to remember that awesome December that all of our cares floated away into the ocean. :) I made four of them, one for each of the ladies.
I had Britt make this cute glasses print and I put on fabric transfer paper and ironed on.
I had decided on rag quilts because I thought that they would be fun and easy. Wrong!! Oh man, it is hard to get the corners to match and they take a long time to make. But they turn out cute. It's a good thing that I started in the spring though. They are smaller blankets, but I figured they would be cute to wrap our babies up in one day. :)
And speaking of crafty.... the queen of sewing made all these cute outfits! Amy (far right) literally sewed all of these blue outfits! I sewed a fourth of my dress and she just had to finish because I got in way over my head. :) But in just working with her for a few hours, I learned so so much. The outfits turned out so cute! Yes we were totally one of those families who do matchy-matchy and we loved every second of it!
Thursday, December 13, 2012
Happy Holidays!
Yesterday was 12.12.12 and our third anniversary! I seriously cannot believe how fast 3 years has gone by. Time flies when you have so much fun!
It was weird thinking about where we were exactly 3 years ago to where we are now. I am so lucky to have such a sweetheart husband!
Since our anniversary is so close to Christmas, we made stipulations for our presents to each other. First of all, part of it has to be homemade. Second, it can't cost a lot of money. Third, it has to go along with the traditional gifts. For your third anniversary, the present is supposed to be either crystal or leather.
I made his gift leather. This was a hard one for me. When I originally thought of making a belt, I thought it would be a walk in the park. My Abuela used to have this leather kit that I would play with when I was little. It has those stampers for leather that had letters and numbers and cool designs. I thought that I would borrow that and it would be simple. Wrong! I should have known that crafting is never that easy! Well, someone ended up borrowing that leather kit a long time ago and it is officially lost. I was so bummed out! I loved that leather kit.
I looked everywhere online. Seriously, everywhere. I know I'm not really supposed to spend a lot of money, but I figured that I would use that again for crafting, so I didn't think it would count. :) Well, it didn't work out. I ended up finding letter stamps on Amazon that ended up being even tinier than I expected. But I made it work! I work a love letter on the belt with the stamps and then I stained the cow hide so that it was a darker color. The cow hide stripe didn't come with the belt buckle, so I went to the D.I. and picked up an old belt and took the buckle off of it.
The belt is a little rough around the edges, but it turned out pretty good!
His gift was way cuter though. He always beats me on the anniversary gift! Remember the glitter shoes from last year? Man, that boy is creative! Well he chose to do crystal. He did a play on words and did crystal clear. He used the Mac to record himself singing some of our favorite songs and put them on a disc for me. Is that so cute or what? Oh man, I love that kid.
This fall I haven't been great about posting. A lot has happened! We spent about 6 months this year house hunting. That is a hard job! Even with putting in full price offers, we got out bid again and again and my heart would break again and again. We had to move out of our apartment for a bit and we stayed with Steven's grandma, but now we are back in the same apartment complex. There is nothing like walking through your own door! Even though we are sad that we didn't get a house, we feel that everything happens for a reason. Our best friend told us, "This just means that your dream house wasn't ready for you yet!" I love that!
This is the wreath I made for our front door. Aren't the reindeer ornaments so cute? I have wanted one since I made some for our moms last year.
The first thing to go up in our new house? Our tree! I love love love our tree and have it up for as long as possible. When I say it was the first thing in our house, I literally mean that it was the first thing in our house!
We decided to redo a lot of our decorations. We decided that since we now know that we are going to be in this apartment for a while, we are going to make it exactly how we want it. This was one of the first things that I made for our new wall. I will post more pictures when I get the wall collage all finished. We are also going to sand and paint our table so I will post about that too.
Our best friends also moved during the fall, and this is the house warming gift that we gave them. I love making wreaths! If you are into making wreaths... remember that awesome gluing tip I talked about last year?
I just had to share this cute little picture. I just love this picture! We had our families over for diner last Sunday. This little lady is our baby cousin and she loves her Teddy and we just love her! It is so fun to be able to have our own place to have our families over.
And tomorrow... we leave for our CRUISE!!!! We are going with our best friends and I have been so excited that I haven't been able to sleep all week! I have been crafting like crazy for cruise things. Last night I made luggage tags for our bags. I used these wooden squares from Hobby Lobby and some modge podge.
I also used the beach bag pattern from tinyseamstress to make this cute cruise bag that I am going to use for my carry on! Ah! I'm so excited!
Our cruise will take us all the way to Christmas Eve, so I won't talk to you guys until the New Year! Have happy and safe holidays and I hope Santa brings you everything you want!
Subscribe to:
Posts (Atom)